Welcome to the Celesticon 2013 Free Kitbashing Clinic!
Yes, the Mad Doktor is in!

Here, my fine schtudents, you vill learn how to “recycle with an attitude” through creating fantastical original science fiction machines from common household
plastic items, parts from broken toys, broken computer mice, and whatever other
hard plastic items you can come up with, your only limitation being your
imagination!
So let us begin…
The Tools of the
Trade
Any craft has its tools, and kitbashing is no
exception. Here’s the ideal, ultimate
list of the tools involved:
1) Hobby
Knife. X-Acto or similar sharp hobby knife designed for cutting plastic or
balsa wood. SAFETY FIRST!! These knives
are SHARP like a razor blade!!
2) Krazy
Glue. SAFETY FIRST!! This is a
cyanoacrylate adhesive, this means CYANIDE, as in POISON. The fumes are not
healthy to breath in, not fun if the glue gets in your eyes, and will bond
skin, clothing, younger siblings, or family pets in seconds with amazing strength!
3) A
pile of plastic parts. This can be anything, from an empty deodorant container,
to an empty plastic bottle, an old toy, a new toy, toothpaste tube caps,
plastic bits such as Legos, model airplane parts, model railroad parts, a
broken computer mouse, something from the local Dollar Store, plastic beads,
small metal fittings used in jewelry making, the list is almost endless, only
limited by your imagination!
4) A
can of flat black spray paint. SAFETY
FIRST!! Spray paint is NEVER to be used
in an enclosed space, so no spraying in your house! Spray paint has solvents, so the fumes are
harmful and should not be inhaled! Spray paint is potentially VERY MESSY, so
proper preparation is required, including placing the item(s) to be sprayed on
newspaper or a sheet of cardboard, spraying when the wind is calm, and allowing
the sprayed items enough time to properly dry.
Spray in an even pattern starting
at the top and working your way down in a steady left to right motion to ensure
an even coating.
5) Water-based
acrylic paint. These can be anything from specialized hobby paints such as
Vallejo, Reaper Miniatures, or Games Workshop paints found in specialty game or
hobby shops, or even acrylic craft paints such as Americana or DecoArt as found
in Michael’s or Hobby Lobby craft stores.
6) A
jar for holding water to clean your paint brushes.
7) Paint
brushes. You’ll want a variety of these,
including some soft, flat brushes for covering large areas of color and
drybrushing, and smaller brushes suitable for detailing, painting graffiti on a
futuristic anti-gravity tank, or rendering intricate camouflage patterns.
8) An
old cloth rag or paper towels for drying your brushes after you clean them.
9) Testor’s
Dullcote. This is a clear, matte, spray finish specifically designed for model
airplanes to seal in the paint job and protect it from handling. Testor’s
Dullcote is available from Hobbytown USA, Michael’s or online through
Squadron.com.
SAFETY FIRST!! This is a spray
finish, so the same rules for spray paints apply to Testor’s Dullcote!
10) Model airplane decals. These are waterslide decals found in model
airplane kits, tank model kits, and available as “after market products”
through HobbyTown USA or Squadron.com. Decals allow you to add a whole new
level of authenticity to your original creations.
11) Micro-Sol decal solvent. This is a clear, brush-on liquid used to help
soften decals so they conform to the surface of the model, and dry with a thin,
more realistic look on the model.
12) Clear plastic flight stand or base. The best look for an original space cruiser
or flying machine is a clear plastic base that suggests the model is in flight
through the air or in deep space. This is actually an easy thing to accomplish,
with such simple expedients as using the lower half of a plastic wine or
margarita glass found at party supply stores.
A computer mouse, some plastic rhinestones, toy parts, model
parts, a toy gun from an action figure…

Getting Started
The best place to start is with your imagination. Pick up an
empty plastic container, soda bottle, or an old toy you found at a garage sale,
and study it’s shape. What do you see besides an empty container, soda bottle,
or old toy? Could it be a
galaxy-conquering stars cruiser of the Terran Empire, hunting for space pirates
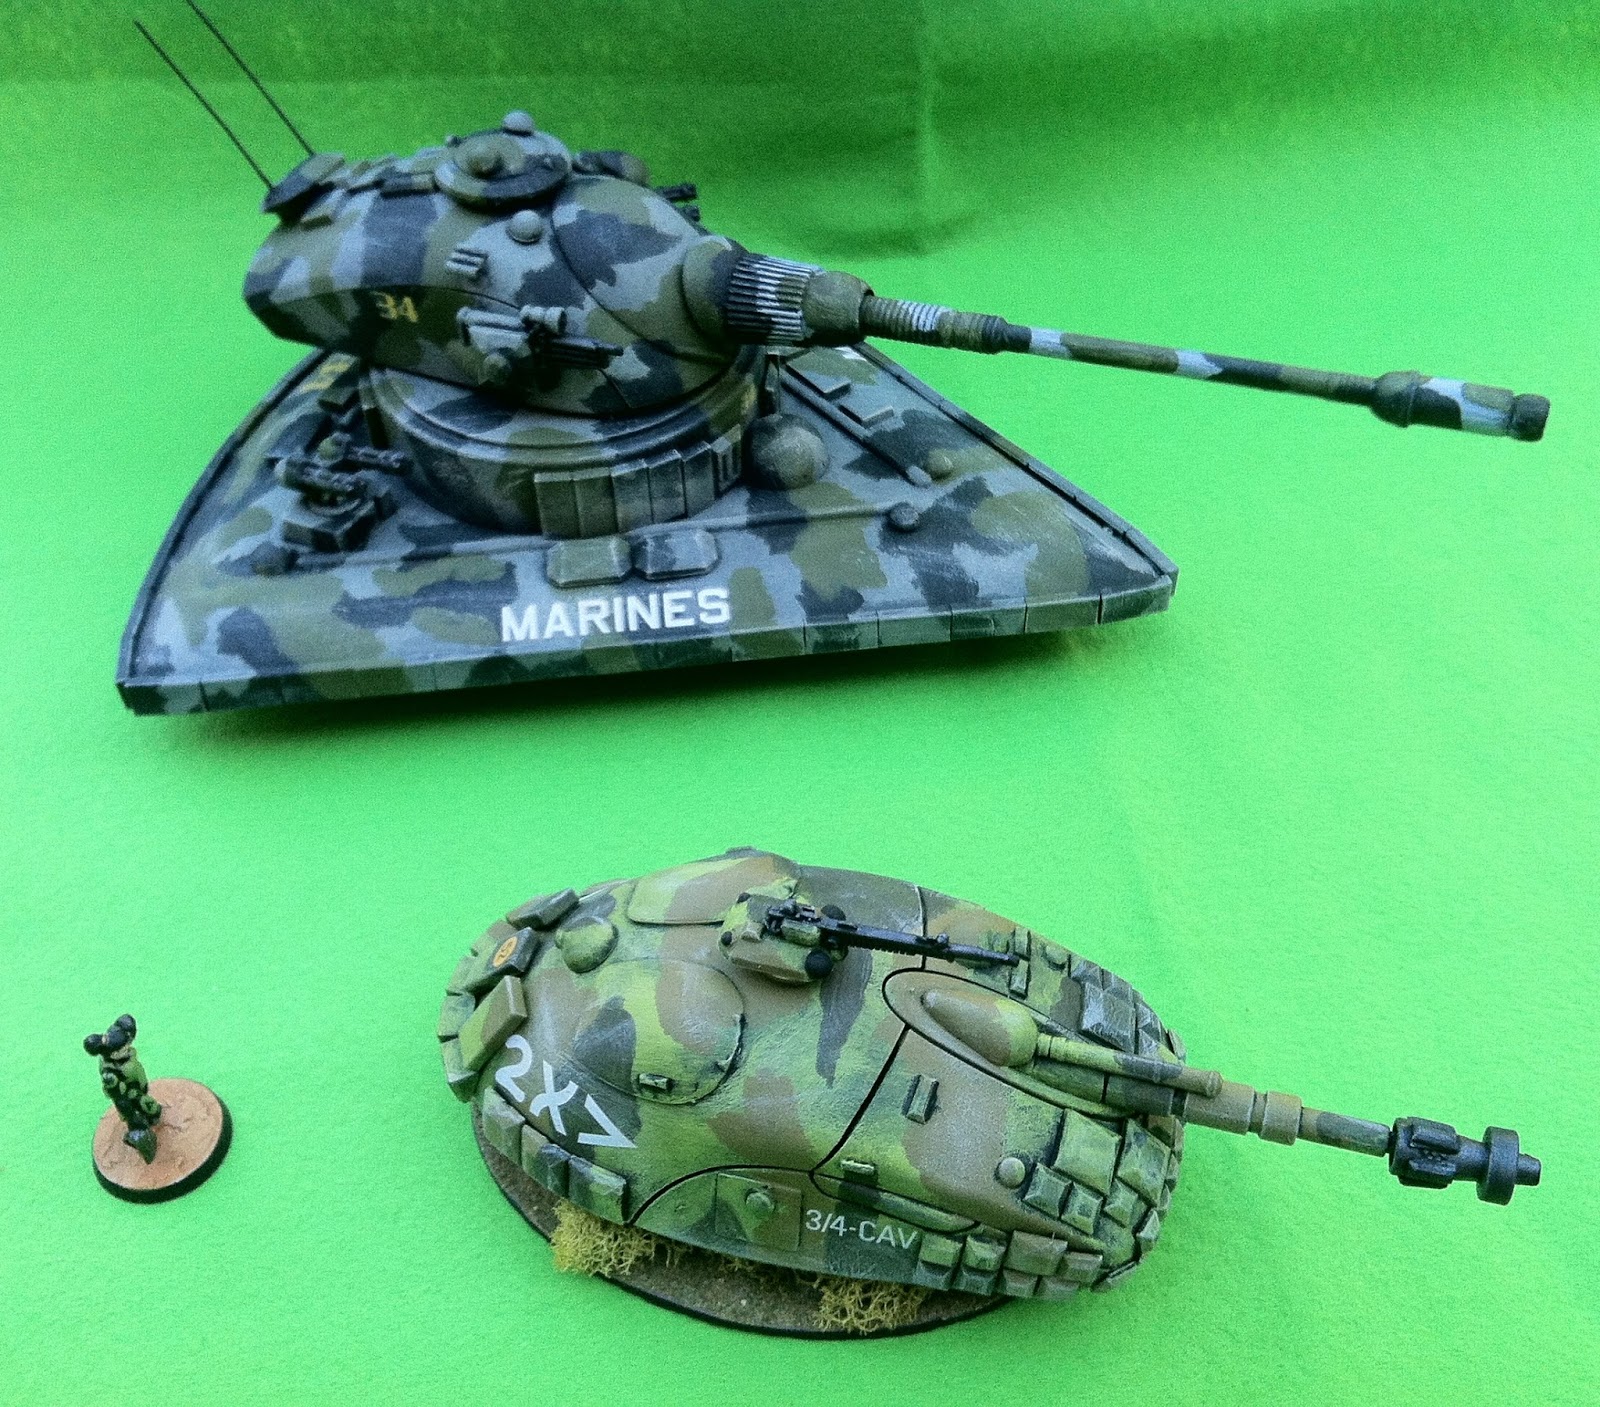
in the darkness of deep space? Is it an
anti-gravity tank of the Imperial Terran Marine Corps defending a colony
against an invading alien horde?
Inspiration can come from any sources, including movies,
television, artwork seen on the internet, a video game, a computer game, a
book, even from real world military or other vehicles or machines. The
following models were all inspired in whole or in part by ideas presented in
science fiction novels, television shows, and sci-fi films, sometimes even a combination
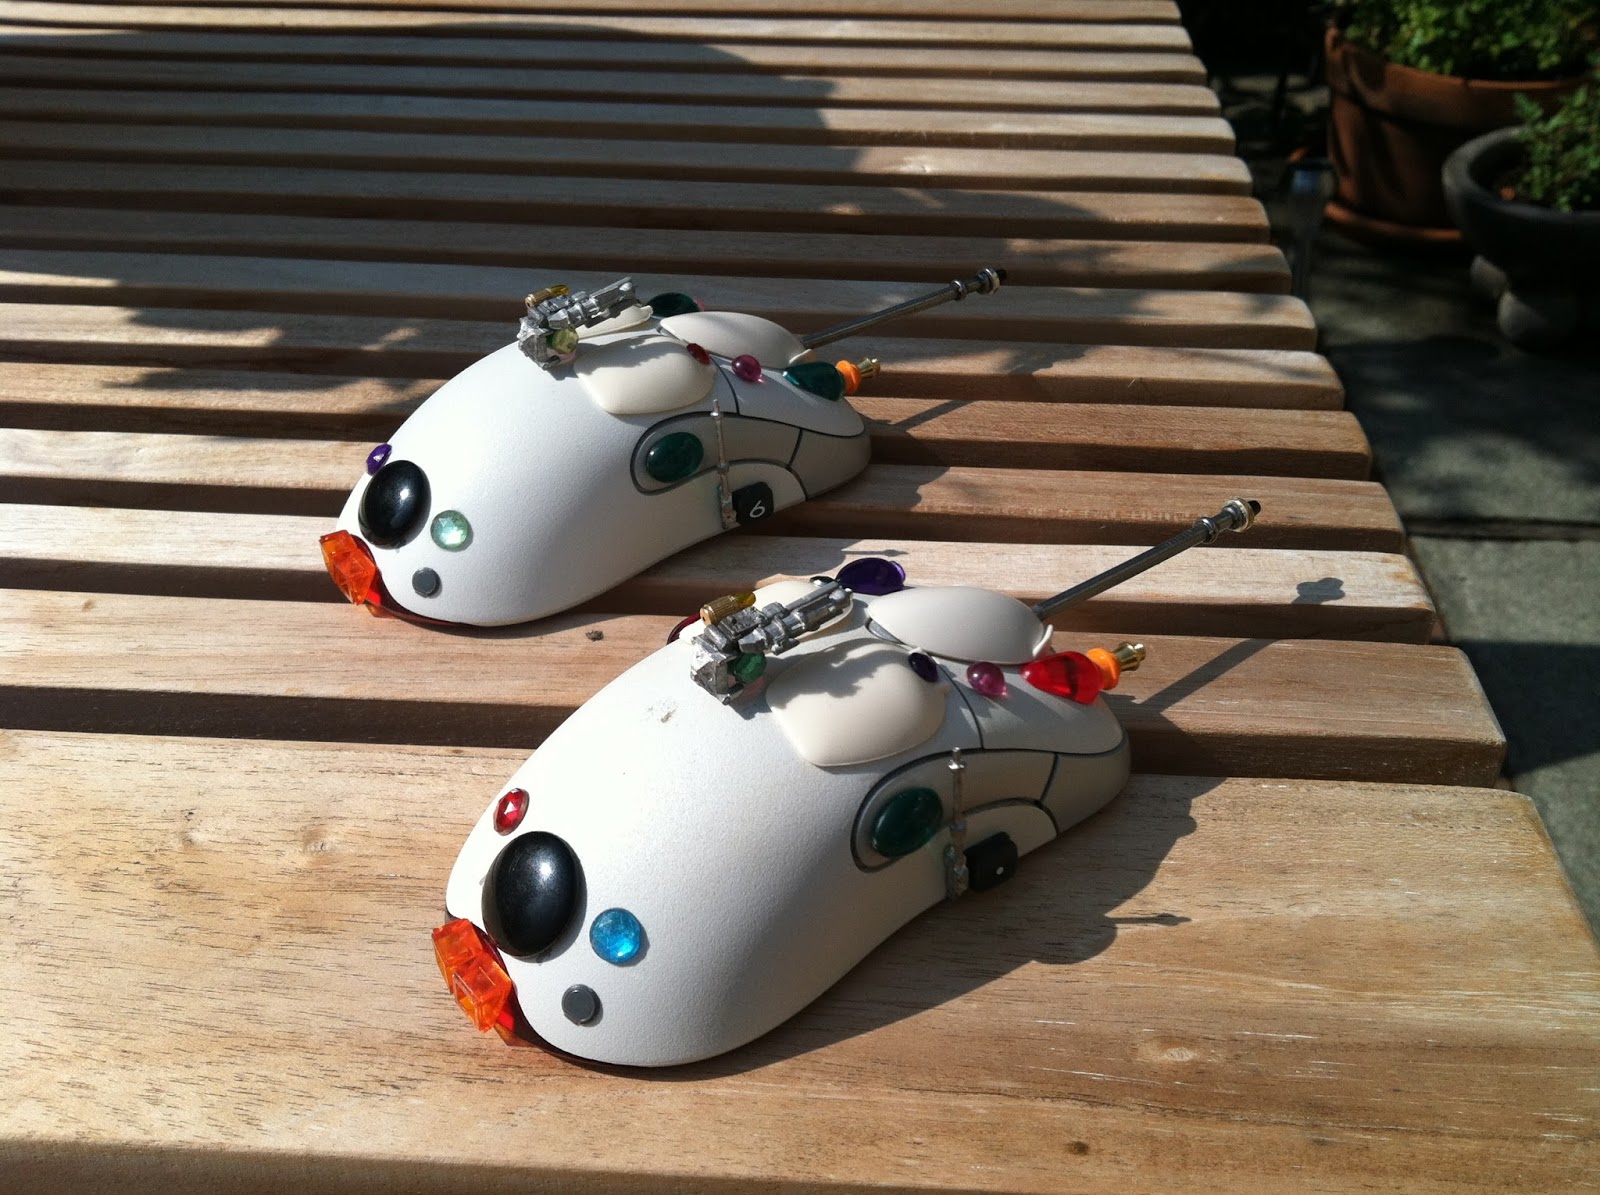
of different sources. Remember that computer mouse above? Well, here’s two more
“dead” mice given a new lease on life as anti-gravity tank destroyers:

Both were done precisely as described in the step-by-step
guide above, from building to the finish including using left over model
airplane decals and a shot of Testor’s Dullcote to seal the finish and protect
the models during handling. The bases are made from some precut wood rectangles
available at the local craft store, a plastic push pin to mount the models off
the wooden base, some model railroad flocking and reindeer lichen also
available at the local craft store. The flocking was applied simply by painting
a very thick coating of acrylic craft paint (Mississippi Mud color!) and
pouring the flocking over the base while the paint was still wet. After drying,
the excess flocking was shaken off, and the base was sprayed with Dullcote to
seal the flocking down. Using white craft glue, clumps of model railroad lichen
and the push pin were glued in the center of the base, with the lichen
surrounding the push pin.
Push pins can be used for all sorts of purposes, from
starship engines to mounting pegs for anti-gravity vehicles; it’s really up to
your imagination! Push pins can be had from a local dollar store or office
supply aisle. White craft glue like Tacky Glue can be found at a specialty craft
store in or the craft supply aisle in many a larger chain store. Wooden bases
can be found in the wood craft supply aisle at craft stores like Michael’s or
Hobby Lobby, or in department stores or hobby shops that have wood craft
supplies. Thick sheet plastic will also make for serviceable bases, and can be
made by simply cutting up an old plastic sign no longer needed for its original
purpose.
Kitbashing is always about making use of whatever resources
you can lay your hands on and repurposing them to serve as parts for a creative
project limited only by your imagination. Whether your project is for a
wargame, a diorama, a school project, or just for fun, it’s also about not
letting something go to waste. A computer mouse that no longer functions or is
obsolete may no longer be useful for its original purpose, but check out the end results of that dead
computer mouse turned anti gravity tank hunter below:

Once glued to the push pin (which was already white glued
down to a wooden oval base from the local Michael’s craft store and the base
coated with model railroad flocking), the model appears to be skimming over a
clump of shrubbery, no doubt stalking some hapless alien tank or walker. That’s
the best part about science fiction and anti-gravity vehicles; there’s no
wheels or tracks or legs to have to build, as the vehicle just skims over the
surface pushing itself up and along with an anti-gravity field generated by the
vehicle’s propulsion systems!
Flying craft work much the same way; propulsion and lift
need to be explained in some fashion, and a suitable flight base is needed
unless you’re going to build your model with its landing gear deployed for the
craft to be grounded. Otherwise flying machines like anti-gravity skimmers are
a snap to create from a wide variety of empty plastic containers, old toys, or
whatever else plastic and no longer needed for its original purpose you can lay
your hands on. In fact, of all the flying machines from science fiction to
make, the easiest hands down is the ubiquitous Flying Saucer! All you need to
get started are two plastic plates of the same size, and a plastic bowl or dome
of some sort for the crew cabin. After that, it’s only a matter of adding parts
to your heart’s desire, and painting your new and fetching interstellar craft
in whatever finish your imagination desires.
A flying saucer can be a tongue-in-cheek pulp fiction Nazi
craft, the product of Werner Von Braun’s Vunderscience, or it can be the
advanced scout of an interplanetary invasion from Mars, full of belligerent little
green Martians armed with deadly energy guns that turn a grown man into a pair
of smoking boots and a pile of ash with one zap!
Space craft in general are even easier to make than anything
else, as all they need is a suitable flight stand such as the black plastic
hexagonal flight bases available from a variety of sources. Here’s a large
space freighter I built from an empty travel size shampoo bottle, some plastic
beads, plastic rhinestones, and self adhesive enamel Christmas stickers:

And here is a menacing star cruiser with a huge front mounted energy cannon made from an empty deodorant container, lots of plastic rhinestones, plastic Christmas ornaments, and other plastic bits and such:

It is really that simple, so when you get an idea that you
are excited about, start looking for plastic parts or bits that will help you
realize the complete vision of your idea. So for example, let’s start with the
simplest of subjects, the starship…
Starships are
Easy!
Yes, they are indeed the easiest of machines to create, as
they fly through the cold, hard vacuum of space, don’t need wings, don’t needs
wheels or tracks or legs, and follow some fairly simple design principles:
1) A
starship has three main components, (1) an engine, (2) a power generator or
fuel tank(s), (3) a crew/bridge section where the crew lives and operates the
starship.
2) A
starship will have a specific job, whether it is a cargo vessel plying the vast
trade routes between star systems, a fast courier vessel carrying VIPs or
important messages or priority cargos from one world to another, a ship for
mining asteroids, or a naval warship for protecting the space lanes from space
pirates and marauding hostile aliens.
Of course, it could just as easily
be a space pirate ship, a smuggler’s vessel (remember Han Solo’s Millennium
Falcon?), or a luxury yacht that space pirates just love to find unprotected
just long enough to fire a laser blast across their bows, “AVAST YE SPACE
DOGS!! HEAVE TO AND PREPARE TO BE BOARDED! ARRRR!!!!”
3) Painting
a starship is full of possible options, from a bold, flashy finish of bright
metallic colors like the old pulp fiction cartoons of the 1930s and 40s, to a
gritty, blaster-burned drab finish such as seen in Star Wars or Battlestar
Galactica. The look is really up to you!
4) A
starship if armed can have anything from blisters that project blasts or beams
of destructive energy like the phasers in Star Trek, to magnetic rail guns such
as seen on the Sulaco in the classic movie Aliens or on the Battlestar
Galactica Herself, or the blasters found in such abundance on the Imperial Star
Destoyers in Star Wars. Missiles also have their place in space warfare, so
don’t be afraid to festoon your swift Terran cruiser with dozens of
hyperspace-drive anti-matter missiles, the better to blast those annoying space
pirates into isotopes!
So where to begin?
The first step is to decide which end is which, which end is the bow
(front), and which end is the stern (rear) where the engine vents reside. This
will get you started building your galaxy-conquering star cruiser! Start by
installing the engine vents; these can be anything from toothpaste tube caps to
plastic beads or bottle caps. It really depends upon how big you want your
ship’s engines to appear.
Next, you’ll want to add parts that flesh out your ship’s
hull by adding extra surface detail. All sorts of parts can be useful for this,
from plastic rhinestones to plastic confetti, pieces cut from plastic vacuform
packaging, to whatever interesting bits you can come up with. Add onto these assorted laser cannons made
from plastic bits of suitable shapes, missiles from model airplanes or made
from other sources like small plastic Christmas ornaments and the like, a radar
dish or dome, whatever you can come up with!
Once you’re satisfied with your ship’s physical look, you’ll
want to prepare it for painting! Take
your creation to a well ventilated area outside
and place it on some old newspaper or cardboard large enough to catch any
overspray. Using a steady side-to-side
sweeping motion, spray your newly created model with black spray paint, then
leave it to dry thoroughly. Once dry,
you can turn the model over and spray the opposite side in the same fashion. You may have to repeat this process several
times in order to completely cover your model. Once the model has been
completely covered with the black paint and is completely dry, you can begin
painting!
Once you’ve settled on the overall color you want to paint
your model, you need to select at least two shades of that color, one that will
be the darker base coat, and one that will be the primary, lighter shade of
that base color. Start by painting the darker shade of the base color using the
drybrushing technique, using a large, flat brush. Once you’ve covered the model
with this base color completely and it has dried completely, apply the second,
lighter shade of the base color in the same fashion.
Once dry, your ship is ready to be detailed! Using a gunmetal grey metallic color, paint
the various laser cannon barrels and engine vents using an appropriately
smaller brush with a good point. Be thorough, and take care not to paint over
your hull color. Once these are completely dry, you will mix up a “wash” of
black paint and water, and carefully apply this “wash” over the gunmetal grey
parts. Let dry thoroughly.
This “wash” will darken down the metallic parts giving them
a more businesslike finish like blackened steel. Additional details can be
rendered by painting some raised details like domes and the like in black or
other colors, to give the impression of radar systems or force shield
generators, etc. It’s really up to your imagination!
The next step in the process is to decide as to whether or
not you want to use some model airplane decals to add an extra layer of
authenticity to your starship. If so, use the MicroSol decal solvent for best
results, and be absolutely sure that the decals are fully dry before you try
and handle your model!
Finally, you’ll want to spray your model with Testor’s
Dullcote to seal in the finish and protect your model from handling. Follow the same safety rules as you did when
you used the spray paint.
Congratulations!
You’re ready to conquer the galaxy of your imagination!